What is an attribution group?
An attribution group is a group consisting of one or more channels, categories, subcategories or ad spaces. The attribution group is used to attribute multiple winners for one conversion. If you create an attribution group, conversions will not only be attributed to the ad space with the highest priority in the customer journey. The conversion will also be attributed to the ad spaces that belong to the attribution group, regardless of their priority.
Let’s use an example to explain this further. Suppose you have the following situation: in your attribution model, ad impressions in the display channel have priority 2, clicks in the content channel have priority 3 and direct-type ins have priority 1. You have created an attribution group which includes the display channel, both ad impressions and clicks. Now you have a customer journey containing the following touch points:
An ad impression of a display banner.
A click on a link implemented in a content ad space.
A direct type-in.
First, the attribution model will be applied and the click related to the content channel (touch point 2) will be assigned as winner, because it has the highest priority. However, because the display channel is part of the attribution group, touch point 1 (ad impression of a display banner) will also be assigned as a winner. Cost or commission will be attributed to both ad spaces.
When you create an attribution group, you limit the number of winners for a conversion. User journeys can get very long and you may not want to attribute commission to every ad space, even tough when they are part of your attribution group. That is why you need to limit the number of winners. If you, say, limit the maximum number of winner to four, the last four touch points of the customer journey will be attributed, provided they are part of the attribution group.
Before you start
Creating an attribution group does not have any technical requirements, but it is recommended to make sure the following:
Make sure all your ad spaces are categorized. Doing so allows you to work on your attribution group far more efficient, because you won’t have to add individual ad spaces.
Make sure you have an attribution model in place. Having an attribution model in place will make your attribution group far more effective.
Getting started
Make sure you are logged in to the platform UI and click on ‘manage advertisers’ in the advertiser section of the main navigation. Find the advertiser for which you want to create an attribution group and click on the icon in the technical section of the corresponding row. If you do so, you will be taken to the attribution manager page.
On the attribution manager page, you will find two main tabs. By default, the tab called ‘single attribution’ is loaded. The other tab is called ‘attribution group’. Proceed to click on it.
Managing attribution groups
Overview
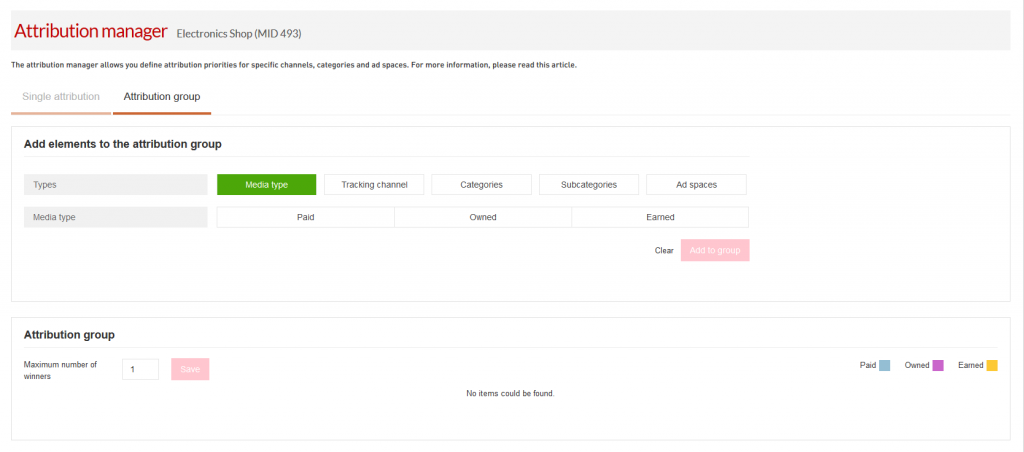
After clicking on the tab ‘attribution group’ on the attribution manager page, you will see a page looking more or less like this:
The page consists of two panels: in the upper panel, you can select and add elements to your attribution group. In the lower panel, you can see the groups you already created for the advertiser, the elements they contain and further characteristics of the group.

Creating your attribution group
To create an attribution group, you need to select elements to add to the group. You can do this on five different levels:
Media type
Tracking channel
Category
Subcategory
Ad space
Let’s see how you select a type for every level:
To select a media type, just click on one of the buttons called ‘paid’, ‘owned’ or ‘earned’ in the row marked ‘media type’.
To select a tracking channel, click on ‘tracking channel’ in the row ‘types’. If you do so, the button will turn green and a drop down menu called ‘tracking channel’ will appear in the second row. You can select the tracking channels you need in your group in this drop down menu.
To select a category, click on ‘category’ in the row ‘types’. If you do so, the button will turn green and a drop down menu called ‘category’ will appear in the second row. You can select the categories you need in your group in this drop down menu.
To select a subcategory, click on ‘category’ in the row ‘types’. If you do so, the button will turn green and a drop down menu called ‘subcategory’ will appear in the second row. You can select the subcategories you need in your group in this drop down menu.
To select an ad space, click on ‘ad space’ in the row ‘types’. If you do so, the button will turn green and three different drop down menus will appear: one for the partner label, on for the partner name and user ID, one for the ad space name and ID. These are the three sub-levels via which you can select ad spaces.
Please note that when you select a partner label, all partners and ad spaces related to this label will be selected automatically in the drop down menus below. You can exclude any partners or ad space without removing the label by clicking on the small cross icon next to the name of the partner or ad space.
If you select a partner, all ad spaces related to the partner will appear. If you do not want to add all ad spaces of the partner, you can remove them by clicking on the small cross icon next to the name of the partner or ad space.
Once you have selected the elements you need for your attribution group, just click on ‘add to group’ in the right lower corner of the upper panel. If you do so, a new row will appear in the lower panel representing the group. It will look more or less like this:

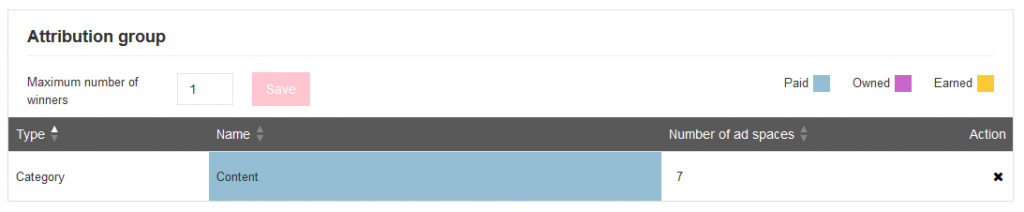
From left to right, you can see the type of element on which the group is based (category in the example above), the element selected for the group (in the example above the content category), the number of ad spaces related to this element and finally a delete button.
Please note that your attribution group will be applied as soon as the database is updated. Usually, this will take no longer than 10 minutes.
Maximum number of winners
After creating the group, it is necessary to define the maximum number of winners for the group. By doing so, you prevent a large amount of winners in the case of a long customer journey. For further explanation, please read the explanation of the attribution group above.
To define the maximum number of winners, all you need to do is type in a number in the field in the left top corner of the panel and click on save.
Editing your attribution group
To remove elements from your attribution group, just click on the icon in the column on the right. Confirm your action in the pop-over window and element will disappear. You can add elements again using the method described above.