Before you start
This article explains how you can manage your creatives with the Creatives Manager.
You can read more about the different creative types in this article.
Getting started
To get started, login to your admin UI and click on Creatives in the main navigation menu and then on Manager in the opened sub menu. Now you'll need to choose an advertiser you want to manage. You will now see the Creative Manager Overview: from here, you will be able to manage everything related to the creatives for this specific advertiser.
The following screenshots shows the basic layout that you can find repeatedly in the platform and in the Creatives product. The screenshot shows the content of a creative set with one selected creative.
The page consists of three main areas – the Top Bar (1), the main Content Area (2) on the left and the Info Panel (3) on the right side.
The top bar contains actions that affect the main content area, for example creating new items (creative sets or creatives) and filtering of the creatives you see. It also provides functionality to quickly navigate between features of the Creatives Manager or the creative sets.
The main content area shows you either a list of creative sets that belong to the advertiser, or the content of a creative set if you navigate into one by double-clicking.
The info panel is an optional view that can be toggled to show context information based on the currently selected item (creative set or creative). The info panel shows you all information specific for this item and allows you to edit it.
Creating a new Creative
Every creative is part of a creative set. So in order to create a new creative, first navigate into the desired creative set. Then follow these steps:
Click in the main bar on the Create Button
Choose the type of creative
Fill in all necessary data
Click Save. After that you are redirected to the previous page and see the new creative in its creative set.
Creatives have much data in common you need to fill in the form now. All Creatives need to have a name and the content of specific the Creative type. These are:
Hosted Image: An image file to upload from your computer
Remote Image: The URL of the image
Link: A text
HTML: The html source code.
Please remember, that links within the HTML source code need to be replaced with a placeholder, in Order to generate tracking links. The placeholders #{ADMEDIA_LINK} or for an encoded target URL #{ADMEDIA_LINK_ENC}, will link to the defined target URL (from the field target URL).
In the UI you will see that the target URL is pre-filled, based on the target URL that is set on the creative set. You can either overwrite the target URL or leave it as it is.
The name field is not mandatory for image creatives, because the file name of the image will be used as default value.
Tip: For hosted creatives, you can select multiple files on your computer to create multiple hosted creatives. In this case, you can't choose a name, but all creatives will use the file name as default value which can be changed later.
Apart from that, you might want to take some time to figure out a good name for your creative. To allow your partners to work effectively with your advertisers' creatives, make sure the name contains information about the purpose of the item. In case of image and html creatives, it is also recommendable to mention the size of the item. A good example of a creative name would be ‘Christmas campaign banner 120×60’.
Editing a creative set or creative
To edit a creative set or a creative you simply select the item in the main area and change the data in the Info Panel on the right side. You need to confirm your changes with the Save Button.
You can change the following fields:
name
description
target URL
content (link text, HTML code, image resource for image creatives)
status (learn more about the specific statuses here)
And for Creative Sets it's also possible to change:
Tracking category
Partner groups
Actions on creatives
Furthermore, you can execute actions on the creatives you selected. These actions can be found just above the Info Panel.
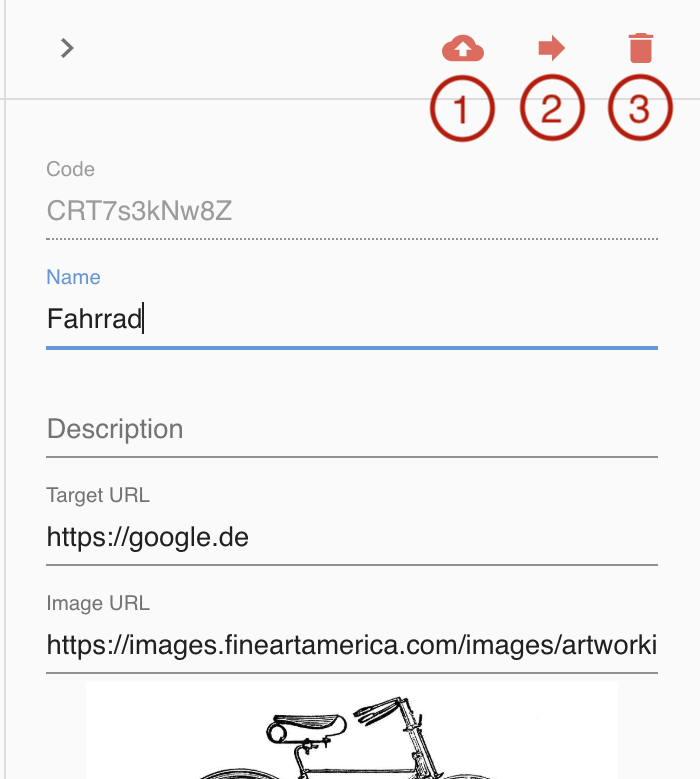
These actions are Converting remote image to hosted image (1), Moving the creative (2) to another creative set and deleting the creative (3).
Remote image to hosted image conversion (1)
This means that the remote image will be downloaded from the remote server to our server and then uploaded to our cloud image provider. This is a one-time action and cannot be reversed! A hosted image cannot be converted to a remote image, regardless if it was a remote image before or not.
Tip: If you want to create a lot of hosted images that already exist as a remote image or you want to migrate your existing ad-media from an external system, it is practical to change the type in the import feature.
Move creatives (2)
Selecting these actions opens the complete tree of all creative sets. Select a creative set in the tree and confirm your selection.
Delete creatives (3)
When you delete a creative set, all creatives in the creative set will be deleted as well.
You can use the status filter and select 'DELETED' to show deleted creatives or sets. This way you can also change the status back to one of the other statuses and undo your delete action. This must be done one by one.
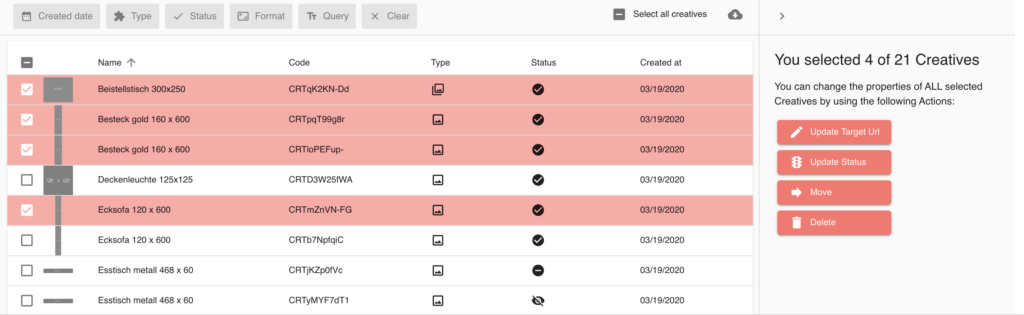
Multiselect feature
You might want to do some tasks for several creatives / creative sets at once. We created the multiselect feature for this use case.
Click on the small boxes on the left side of each row to select multiple entries. The Info Panel will change and show you the available update options for your selection.
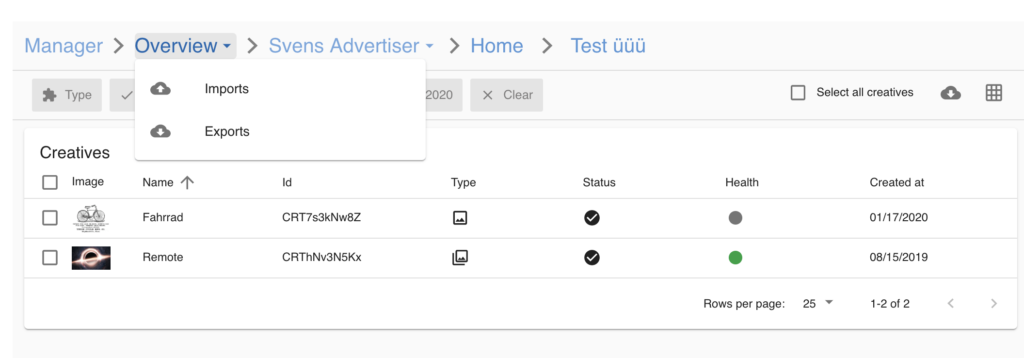
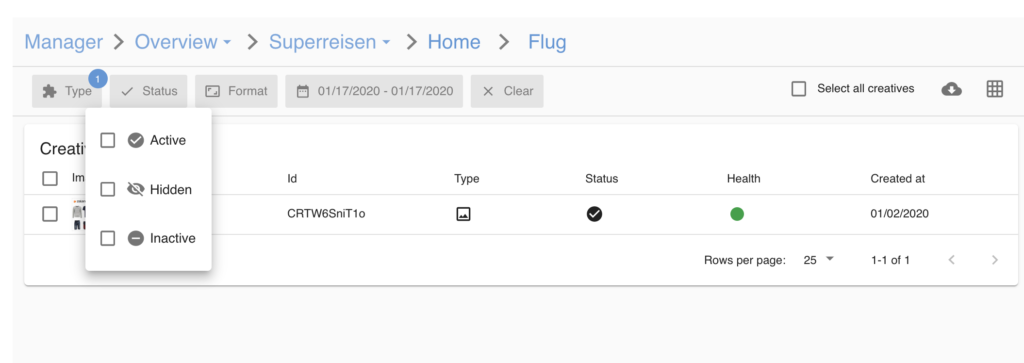
Filtering the content you see
To reduce the number of creatives to get the relevant results you need, you can use the filter options in the top bar. Without any confirmation, you'll instantly see creatives according to the filter you activated. If you have an active filter you'll see a small indicator on the corresponding filter option. To remove all active filters, just select the clear button. Possible filters are Type (Hosted, Remote, Link, HTML), Status (Active, Hidden, Inactive), the IAB display formats (only useful for Image Creatives) and the date of creation.
Quickly navigate between features
The main bar allows you to quickly switch between features of the Creative Manager. The second breadcrumb allows indicates the current feature you are in, when opening the Manager this is always the Overview feature. By clicking on Overview you can see more features that are available in the Manager module.